This is a reprint of two articles I wrote for the Syracuse Astronomical Society newsletter, the Astronomical Chronicle, for April and May of this year. The series of articles is designed to introduce members and visitors to our equipment (the equipment generally found at Darling Hill) to help them decide what piece of equipment might work best for them. And so…
"What should I get?"
This is the first article in a series that hopes to provide useful answers to a commonly asked question at Darling Hill Observatory. The plan is to introduce prospective purchasers to the broad range of equipment used by the SAS regulars, including pluses and minuses, benefits and hazards, complaints and complements. For some of us, we've had the same core equipment for years and know their subtleties backwards and forwards. For a few others, they always have a new purchase to show and a new tale to tell (I await the show-and-tell from this past weekend's NEAF purchases). Hopefully, having the first-hand accounts of a variety of equipment will inform you a bit more about future purchases than the flowery descriptions found on manufacturer websites.
I am beginning this series with my astro gear, with a few other members already committed to similar write-ups. We are happy to have submissions from other members! If you have a pair of binoculars or a telescope that you love or hate, consider sending off a review of your own for this series. You might help convince someone to go through with a purchase or spare them the annoyance of having to send something back!
1. Two (Myopia-Corrected) Eyes
Starting with the obvious, but it is worth remembering that, regardless of what anyone recommends, these are the original tools of the trade and the most cost-effective amateur astronomy starter-set you could ask for. You can spend many a night with your other equipment at home and still have an extraordinarily enjoyable and productive viewing session.
From our virtually never-changing vantage point on planet Earth, the Night Sky still appears to be a gigantic place. If your night observing always occurs at the same time every night all year long, you find the visible stars and constellations changing gradually over the course of the year. Such constant observing might provide you an inkling of what the ancient Egyptians (and, later, the Greeks, and, later, and Romans) realized about the cyclic nature of the Night Sky such that you begin to attribute the rise of certain bright stars to changes in the seasons or the appearance of meteor showers. You also become familiar with patterns of bright stars and find ease in remembering the shapes of these star patterns instead of the single pinpoints of light. Whether because of the connections passed on through oral history or to reinforce the mythology, you connect these patterns to religious or mythological characters. The earliest efforts to catalogue the stars into Constellations date back 6000 years in the form of tablets found in the Euphrates River Valley. Roughly 4000 years later, the Almagest by Ptolemy of Alexandria (yes, THAT Ptolemy) set in stone the 48 Constellations of the Northern Hemisphere so deeply rooted in (and passed on from) older civilizations. These constellations served as calendar markers, signs for planting and harvesting crops, navigational aids for aligning oneself (and your ship) in travels throughout the Mediterranean, and signals from the Heavens themselves that a religious observance was near.
You, on the other hand, get two nights a month in central NY when the sky's clear enough to see anything, so you barely know what should be out on any given night and certainly don't have the time in your busy schedule to start digging through books or googling for star charts right before a Messier Marathon. At this point in our history, you don't really need the Constellations for anything significant unless you find yourself in the middle of nowhere without a compass or standing outside after some James Burke-ian doomsday scenario where all of the power (and I do mean ALL of the power) is out, well, like someone hit a switch.
Most amateur astronomers have taken 6000 years of pattern matching to hveart and memorized at least several of the Constellations to serve as the "coarsest" adjustment on their alignment with major astronomical objects. There are approximately 1020 "bright" stars that Ptolemy grouped in his Almagest into the 48 Northern Constellations. Imagine having only stars and Messier objects to search with without designated Constellations. To tell an observer that M42 is just above Nair al Saif only makes sense if that observer has committed several hundred bright stars to memory. Tell that same observer "M42 is just above the tip of Orion's sword below the belt," it's a good guess that practically everyone will know exactly what you mean.
With rare exception, all astronomical gear requires that you have prior knowledge of where the thing you want to see is (and, if you have a GOTO scope, you still need to know how to set it up and align it, so you still have to have the locations of a few stars committed to memory). Regardless of what you use, your viewing life is made much easier by starting with unaided eyes and learning your way around the largest "objects" in the Night Sky. We ALWAYS recommend that people new to astronomy start with binoculars instead of shelling out a large chunk of change on a telescope. To get the most out of your binocular experience (and until they make GOTO binoculars), we can't recommend strongly enough simply standing outside equipment-free and committing the Constellations to memory.
2. My Starter Scopes: Nikon Action 12×50 Binoculars
With increasing light pollution and the resulting gradual dimming of fainter stars in large Constellations, you almost need a low-power pair of binoculars to make out the fuzzy patches that used to be naked eye objects.
You can (and will) certainly hear lively debates about the merits of various scopes and eyepieces on the Hill, but there is one point all of the regulars agree on, a point we try to stress as much as possible to perspective astronomers. You are far, far better off starting your astronomical pursuits with a good pair of binoculars. Unless you've a quality GOTO scope that you know how to use and maintain, you can spend hours trying to aim a telescope on one object and never get that object within your sights if you don't have a quality understanding of the signposts in the sky that help you go from the "coarsest" adjustment of your eyes to the "finer" adjustment of slight-to-moderate magnification achieved by binoculars. Every step up in equipment and every jump in magnification requires that you have a very good understanding of where things are.
My Nikon 12×50's are my "old faithful(s)" and I spent three solid years of observing using nothing but (and I STILL haven't seen everything I know is possible to see at this magnification). I can't recommend them strongly enough, but there are many similarly-sized binoculars among SAS members that I would be just as happy to own. There are a few general things to look for when purchasing binoculars:
A. Aperture
While any pair of binoculars will allow you to see more than you can with the unaided eye, there is a certain class of binoculars that are much better for nighttime observing than others. This class of binoculars maximizes the ratio of aperture to magnification. The aperture (your primary or objective lens) is the entrance in the "front" of your binoculars through which light passes. All astronomy equipment is about aperture maximization, as larger apertures mean brighter and better resolved images (because you're allowing more light to go into your eyepiece). At the same magnification, a pair of 12×50's is going to be better for nighttime observing than a pair of 12×25's. If you buy binoculars locally (simply due to what most places around here commonly stock), you will find a large selection of Nx50's (N usually being 7, 10, or 12). You will be hard-pressed to find people complain on astronomy forums about 50 mm objective lenses. Instead, they will complain that "the magnification is too high for the aperture." For new astronomers and seasoned pros simply wanting to shake the cobwebs off, 7×42 or 7/10/12×50 binoculars are excellent.
B. Magnification
Related to the aperture discussion above. The goal of a pair of binoculars is NOT maximum magnification. The goal is maximum magnification supported by the size of the aperture for what you want to look at. 12x magnification certainly brings out astronomical details that most of humanity has never seen, but 12x magnification with a 25 or 35 mm aperture will serve you far less than 12x on a 50 mm or larger aperture or 7x on that same 35 mm aperture. The range of easily managed binoculars at the Hill falls between 7×50 and 12×50, with 10×50 perhaps being the best compromise of magnification and image clarity (this is, of course, dependent on the quality of the optics).
C. Prisms, Glass, and Coatings
This is the technical part of the program where newcomer eyes glaze over and you consider blindly accepting whatever someone else tells you. Even seasoned amateur astronomers might not know the chemical composition of BaK-4 or the material used to coat lenses, but they know the general trend towards improved image quality with improved components. As you consider purchases, the gross generalizations below serve as useful guides.
|
|

Roof (left) and Porro (right) Prism binoculars.
Prisms: Roof and Porro
While I risk starting a war among binocular users, the difference in image quality between similar-quality roof and porro binoculars to my eyes is zero. I find porro prism binoculars to be the better design for astronomy because (1) there's a bit more material to hold onto (most of them even have grips) and (2) it is easier to put porro prism binoculars onto tripod adapters because you've got more room between the primary lenses (this is of more importance when it's 10 p.m. and pitch black). Note these reasons have nothing to do with the quality of the optics.
Glass
"BaK-4" glass is better quality than "BK-7." There's a lively photophysics discussion in there somewhere. Ignoring the chemistry of the glass and the manufacturing process, BaK-4 glass has better light transmission, which means a better quality image across the entire field of view. I've had the rare opportunity to compare both kinds in the same 12×50 binoculars and will admit to having a better experience with the BaK-4. That said, having a higher quality of glass prism in a pair of binoculars often also means having a higher quality of production. A high quality BK-7 pair might look just as good as a good pair of BaK-4 binoculars, but you would need to have them next to one another to test this.
Coatings
The optics in binoculars and telescopes let most of the incoming light through, but some small amount is reflected (most reports say 5%), the result of which is a slightly dimmed view. While a 5% loss at each air-to-glass interface might seem small, a pair of binoculars might have a dozen or more of these interfaces, meaning the actual amount of light hitting your retina might be significantly lower than the amount entering your optics. This reflection loss is greatly diminished by way of coatings, which can drop the amount of reflected light from 5% to as little as 0.25%. The larger the number of coated surfaces, the smaller the percent of reflected light and, of course, the higher the cost of the binoculars. The four categories of coatings are as follows:
C = coated. This typically means "multiple surfaces coated," but that does NOT mean all surfaces.
FC = fully coated. All air-to-glass surfaces are coated.
MC = multi-coated. These may be layers of the same coating or combinations of different materials that yield higher transparency.
FMC = fully multi-coated. Like FC, but the magical multi-coat combination is applied to all surfaces.
Yeah, but what does it all really mean? It is very difficult to adequately describe how prism, glass, and coating quality alter the quality of a set of binoculars. All things being equal, one might say a BaK-4 FMC set of porro binoculars are the best combination for amateur astronomy. In every ranking I've found online, the coating order is C < FC < MC < FMC. As for whether or not FMC 42 mm aperture binoculars are as good as C 50 mm aperture binoculars, I've not yet found studies online. These are manufactured products, however, and I'm sure we all know examples of high-quality merchandise that went back because of defects or mid-priced merchandise that somehow magically performs better than anything else you've ever used.
D. Price
Just cut right to the chase. Ballpark, I would expect to pay between $80 and $150 for a pair of 12×50 FMC porro binoculars that perform admirably at night. I know you can spend $1500 on a pair of 12×50's, but I've never had the pleasure of using a pair to see just what it is I'm missing (although I would miss the $1500). You certainly don't want to spend an exorbitant sum of money to buy what the pro's wouldn't be caught dead without, but you also want a quality-enough piece of equipment that you ENJOY using them for observing. My Nikons were $130 when I bought them and, six years later (and $30 cheaper online), they are still in great condition and are still the best pair of binoculars I've ever used for nighttime observing.
E. Wait. Weight!
There is one issue left to address that improved my binocular experience 10-fold.
If you're on the Hill, you may find several people with their elbows on the tops of their cars or the sill of the Observatory rolling roof. This is for cutting down the shaking in the arms that makes focusing on a dim object virtually impossible (and certainly never for more than a second). I am both a prolific shaker in the cold and a perfectionist when it comes to perfecting my focus. Because of this, I strongly recommend buying a tripod even for small binoculars to anyone wanting to really study an astronomical object. The tripod diminishes your freedom of movement, but the added stability greatly improves your ability to make out fainter features. I've a cheapo $30 camera tripod and binocular adapter that is very lightweight and is remarkably stable (unless the wind really picks up). And, if it's never come up before, the adapter for mounting most small binoculars to tripods is a separate accessory (I don't think I've ever seen a pair of binoculars that did not include a thread under a plastic cover in front of the focuser).
|
|
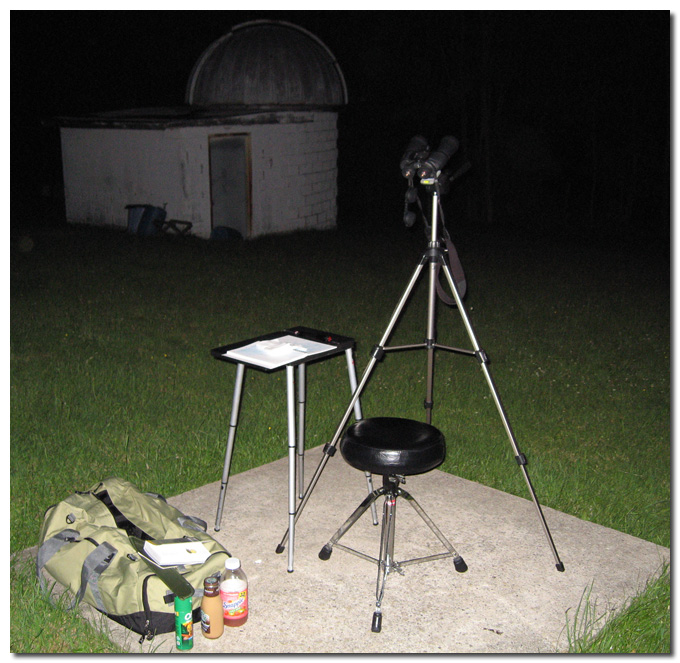
The author's first official setup.
3. Zhumell Tachyon 25×100 Astronomical Binoculars
With three years of Nikon Action 12×50 viewing under my belt, I decided that the next logical progression for astronomical viewing was to move to a higher-magnification pair of binoculars. After as much google-searching for reviews and product comments as I could find, I settled on a pair of Zhumell Tachyon 25×100 Astronomical Binoculars and one Zhumell Heavy-Duty Tripod. Now into my third year of using these binoculars, I have a few clear insights to pass along concerning giant binoculars. The discussion I would have here about prisms, coatings, and equipment quality is addressed above, so I will jump right to the case of the equipment itself.
A. "Why buy one when you can buy two at twice the price?"
I ordered the Zhumell 25×100's and tripod from binoculars.com (a small but stereoscopic subsidiary of telescopes.com). Upon opening the hard case these binos were shipped with, I discovered that the key for the latch lock had slipped loose inside of the case and had settled into a piece of foam just below the right objective lens. The movement of the binos during shipping had, you guessed it, caused all kinds of minor markings from the key scraping against the bottom (not the lens, which had a heavy plastic cover on it). With $500 committed to this company in binoculars and tripod, I called about a replacement. If you pay for a new piece of equipment, make sure you're happy with it and don't worry about the company's cost of making you a satisfied customer. binoculars.com was happy to send me a replacement with free overnight shipping if I agreed to pay for the cost of the second pair (which they would then reimburse me for when the old mangled pair came back). That night, I took the marked-up pair onto my roof for some testing. In short, the view was phenomenal, with all four stars in The Trapezium (no splitting of the doubles!) in M42 (the Orion Nebula, also phenomenal in the binos) clear pinpoints of light. The Moon was almost too bright, which made the view at the terminator even more interesting.
|
|
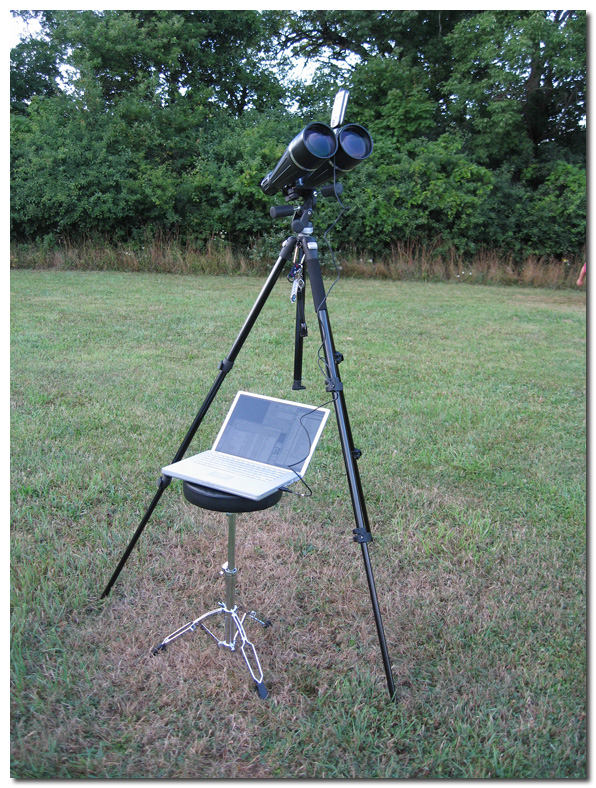
Central command at last year's Summer Seminar. Zhumell Tachyon 25×100's and Zhumell Heavy-Duty tripod (acting as a cellphone mount for updating the SAS website).
That next evening, I packed-up the marked-up pair and took the new pair out onto the roof. In short, the view was awful. Something was wrong with the collimation and nothing could be brought into clear focus in the right eyepiece.
The next day, the new pair goes back and a THIRD pair is shipped overnight (and, yes, I am sitting on $1200 in charges to this company at this point). The next-next evening, I've the third pair of 25×100 binos on my roof. In short, the view was intermediate between the marked-up pair and the second pair. I then decided to keep the marked-up pair to use as an example that "it's what's inside that counts."
So, what did I learn? First, if you can afford to, if you're going to buy a pair of binoculars online and not get a chance to use the pair first, consider ordering two and keeping the better pair. This idea was not mine but was, in fact, that of the customer service rep I talked to at binoculars.com. The problem with focusing may be you, but that's only easy to diagnose if you've two pair of binoculars in front of you and one of them clearly doesn't focus as well as the other one. While my purchase of the Zhumell's was clearly a bit of an ordeal, the final (and original) pair of 25×100's provides incredible views. On a very good night, you can see the banding in Jupiter's atmosphere, the Cassini Division in Saturn's rings is well-defined, and all of the major moons of both planets are obvious. The nebulosity of the Orion Nebula is also pronounced at this magnification, significantly more so than with 12×50's. Albireo, the head of Cygnus the Swan and my favorite binary star system, looks phenomenal at 25x, with the orange and blue-green pinpoints clear and well-defined. As a reference (and when visible, of course), I use Albireo to focus the independent eyepieces of the binos.
With 7-to-12×50 binoculars, a tripod can greatly improve the detail one can see while observing objects because your magnifiers are locked in place (on the tripod, that is) and the slight shaking one may experience from fatigue is removed from your observing. In the case of giant binoculars, you virtually have no choice but to tripod-mount them. With the considerable magnification and the significant weight of 20×80 or 25×100 binoculars, a stable tripod is a necessity. I found many sites and reviews that mentioned one should expect to spend half the price of the binoculars on the tripod. This makes for a considerable investment the first time, but you do want a rock-solid support for the binoculars both because you want to make sure they will not tip over without a fight and because you don't want strong winds or shuffling bodies to cause the binos to shake while you're trying to observe. At 20x or 25x magnification, even a moderate breeze will cause a poorly-supported pair of binoculars to rattle around.
B. So, what are the benefits of giant binoculars?
i. With proper solar filters (see Barlow Bob's article in this issue!), you have an excellent tool for solar observing, with large Sunspots and prominences visible.
ii. You can clearly see planetary detail in Jupiter and Saturn, the phases of Venus, and the Moon is spectacular.
iii. In some giant binoculars, you can attach filters to the eyepieces, helping you to accentuate detail in planets and nebulas.
iv. The set-up and tear-down time is much faster than for a telescope, which is less important in Summer but ever-so important in the middle of Winter.
C. What are the problems with giant binoculars?
i. You see what the tripod and your neck allow you to see. Unless you have a right-angle bracket in your binos or some means of projecting the image somewhere else, the amount of sky you're capable of viewing is severely limited by the tripod. I often find myself only looking at objects between 0 (horizon) and 40 degrees. Any steeper angle will begin to cause neck fatigue quickly and will start an awkward dance as you and the tripod try to find an equilibrium for the five associated legs. Sitting on a comfortable stool, the 0-to-40 degree angle view is generally quite pleasant. At Darling Hill, we have Syracuse to our North, Cortland to our South, the occasional Tully glow to our East, and a somewhat high tree line to our West. The wash from city lights tends to make viewing at the Horizon quite difficult, which means the "useful" angles for giant binoculars (for viewing already dim objects) reduces from 0-to-40 to 10-to-40 degrees.
ii. Two Independent Focusers – Most every pair of giant binoculars uses independent focusers for the eyepieces. While I assume many would argue this to be a benefit, I see this as more of a "practical" hindrance. Not only do you have to focus each eye independently, but the person using your binoculars at a public viewing also has to focus each eye independently (if they opt to attempt it). I spend a considerable amount of time trying to get both eyes properly adjusted some nights, which is time I'd rather spend viewing.
I had adjusted myself to the pros and cons of giant binoculars for one very important reason. I told several members of the SAS that I was NOT going to buy a telescope at any point in the near future. Why would I buy a telescope when I'd have to then shell out $10,000 for an SUV to drive it around with? It was at this point that I found in my possession the telescope that changed my mind about these one-tube wonders and finally lead me to no longer recommend giant binoculars as the best tools for next-step amateur astronomy.
4. 6" f/5 Newtonian – The "Stu Special"
My scope of choice is a 6" Newtonian assembled by our own Stu Forster, a scope that we'll ceremonially pass on from SAS President to SAS President. I will NOT be addressing all of the pros and cons of telescopes in general. There are enough varieties in the SAS that people with far more experience with other types can address their operation in detail. I will instead focus on the small Newtonian variety and NOT cover (yeesh!) GO-TO varieties.
|
|
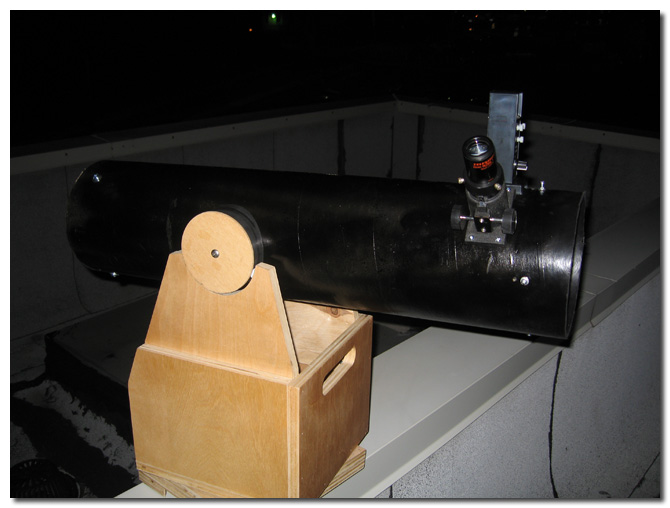
The "Stu Special."
A. The standard "academic" benefits of Newtonians
Chromatic aberration-free
This means that all of the different wavelengths of light are focused the same and you don't get the slight splitting of the different colors of the rainbow as you move towards the edge of the field of view.
Only one important mirror
There is only one big mirror in a Newtonian that requires fine grinding and polishing and not the several pieces of large glass in smaller yet more compact designs. This tends to keep the cost of a new Newtonian down (and, if you're crazy enough to build a scope by yourself (Stu's not reading this, right?) you've only one piece of glass you can butcher instead of 4 possible future paper weights).
B. The standard "academic" problems with Newtonians
Coma-toss-up
Coma is an aberration that causes a "flaring" of images towards the optical axis. If the object under visualization is dead-center in your scope, it will have zero coma. As you move away from the center, this flaring becomes increasingly prominent. In general, you won't notice this with a scope with a focal ratio of f/6 or higher, f/5 is the kinda-sorta point for seeing the flaring, and f/4 and smaller scopes will have, in the absence of corrective lenses for the scope, noticeable flaring at high magnification.
Arachno-annoyance
Until someone designs a secondary mirror that hovers motionless in place, the support bracket that keep the secondary mirror in place (known as the "spider") is a contrast-reducing obstruction that is most significant when looking at bright objects (for instance, the familiar "plus sign" that appears superimposed on some photographs of bright stars). There are games that can be played to reduce the obstruction, usually at the cost of secondary mirror stability.
|
|
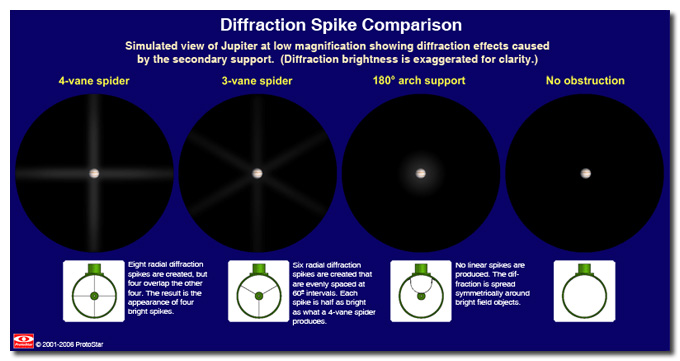
When + is a – : Spider geometries and the view from your Newtonian (from www.fpi-protostar.com).
"Careful with that Newtonian, Eugene"
Newtonians tend to be a bit bigger than their, er, smaller counterparts. This means there's more surface area to hit, shake around, bump into something in your backseat, etc., that can de-un-mis-align the primary and secondary mirrors. The act of collimation to bring these mirrors back into proper position is a straightforward but certainly care-requiring task that may need to be done on a regular basis for best viewing. In contrast, refractors and catadioptric scopes have fixed collimation (one of the many benefits you end up paying for).
And that's all terribly interesting, but what does that have to do with me on the Hill at 11 p.m.?
C. The Big Benefits of a Small Newtonian
Usable Zoom Levels Cover the Range of Binoculars
Clearly a 6" mirror is better than a 50mm or 100mm binocular objective lens. You have at your telescope disposal any reasonable magnification you like provided you have the right eyepiece. Furthermore, the use of successive eyepieces to zoom-in on an object is a very easy way to find objects.
Why Stare At Your Zenith Inside When You Stare At Your Zenith Outside?
A small Newtonian telescope is a win-win over binoculars when the object under investigation is right (or nearly right) above you. Objects at your Zenith are as far as they'll ever get from the horizon (so the dimming influence of city light is minimized when you're surrounded by cities) and you are separated from sed object by the least amount of atmosphere when you look straight up, two factors that make viewing at the zenith just about as good as any view will ever get. As the eyepiece on a Newtonian is sitting perpendicular to the length of the scope tube, when that primary mirror face is pointing straight up, the view in that eyepiece is pointing straight out at you.
Complete Freedom of Movement
For the most part, you have the entire sky accessible to you from a tabletop-mounted scope provided you can walk around the table and aim accordingly. This is in stark contrast to a tripod-mounted pair of giant binoculars.
One eyepiece to satisfy them all
There is one eyepiece to focus and one big knob to focus with. When observing with more than one person with finicky eye sight, this greatly cuts down on the amount of time spent getting the view decent for each viewer, specifically when compared to a pair of giant binoculars.
If it was good enough for Isaac Newton…
In my own opinion, after a pair of quality 7-to-12×50 binoculars, the best next-level piece of equipment one can buy (or, preferably, have handed to you) is a small (5" to 8" primary mirror) Newtonian scope.
www.rocklandastronomy.com/neaf.htm
en.wikipedia.org/wiki/Euphrates
en.wikipedia.org/wiki/Almagest
en.wikipedia.org/wiki/Ptolemy
en.wikipedia.org/wiki/Mediterranean
en.wikipedia.org/wiki/Messier_marathon
en.wikipedia.org/wiki/James_Burke_(science_historian)
en.wikipedia.org/wiki/Nair_al_Saif
en.wikipedia.org/wiki/Messier_42
www.optcorp.com/product.aspx?pid=2950&kw=nikon%20action&st=2
en.wikipedia.org/wiki/Binoculars
www.google.com
www.zhumell.com
www.zhumell.com/specialty/zhumell-binoculars-astronomical.html
www.zhumell.com/specialty/zhumell-tripods-astronomical.html
www.binoculars.com
www.telescopes.com
en.wikipedia.org/wiki/Trapezium_Cluster
en.wikipedia.org/wiki/Moon
en.wikipedia.org/wiki/Lunar_terminator
en.wikipedia.org/wiki/Collimation
en.wikipedia.org/wiki/Jupiter
en.wikipedia.org/wiki/Cassini_Division#Cassini_Division
en.wikipedia.org/wiki/Saturn
en.wikipedia.org/wiki/Orion_Nebula
en.wikipedia.org/wiki/Albireo
en.wikipedia.org/wiki/Cygnus_(constellation)
en.wikipedia.org/wiki/Sunspots
en.wikipedia.org/wiki/Solar_prominence
en.wikipedia.org/wiki/Venus
www.syracuse.ny.us
www.cortland.org
en.wikipedia.org/wiki/Tully_(town),_New_York
en.wikipedia.org/wiki/Newtonian_telescope
en.wikipedia.org/wiki/GoTo_(telescopes)
en.wikipedia.org/wiki/Chromatic_aberration
en.wikipedia.org/wiki/Coma_(optics)
www.fpi-protostar.com
en.wikipedia.org/wiki/Careful_With_That_Axe,_Eugene
en.wikipedia.org/wiki/Refracting_telescope
en.wikipedia.org/wiki/Catadioptric
www.zenith.com
en.wikipedia.org/wiki/Zenith
en.wikipedia.org/wiki/Isaac_Newton